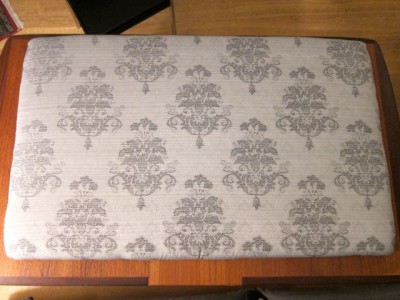
I cannot actually believe I have finally created my own DIY headboard after wanting to do so for years! (Seriously, probably like 3, and especially a lot the last year). I cannot wait to show off my new beauty so here it is!

It was a lot easier than I thought it would be, but then again I did have help from my amazing mum! It was really tiring work and it did take a long time. Although that may just be because we had dinner in the middle and finished late. It was also a lot more expensive than what I had initially thought, but then again my fabric was expensive and I could have used thinner foam which could have cut down the cost.
Material:
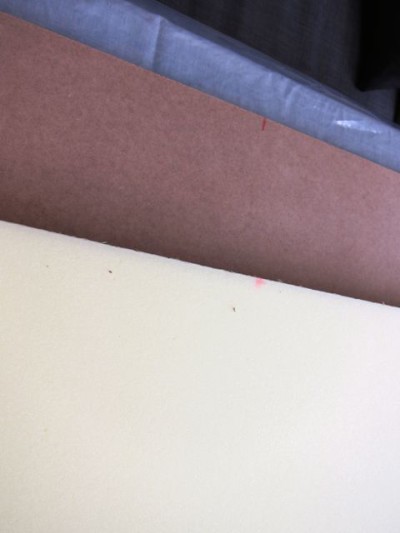
- MDF – I found a pre-cut 12mm thick 122 x 75 cm – which was perfect for my 120cm bed. (147 nok = 23 usd)
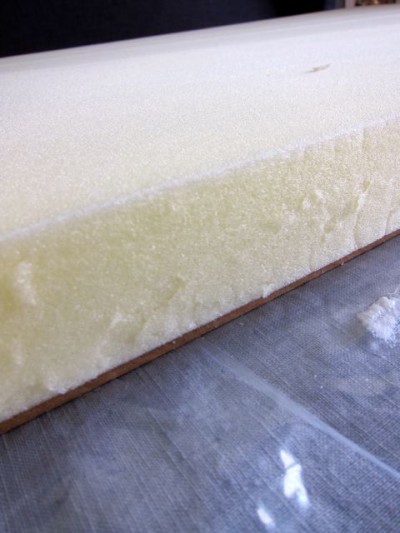
- Foam – I got 5cm thick 124 x 77 cm. The lady was really helpful and recommended one cm extra on each side (367 nok = 57.5 usd)
- Batting – She had some extra that she gave me (50 nok = 8 usd)
- Fabric – I used a curtain fabric which I found on sale. It was still expensive, but I really love the pattern! I still have some left that I will maybe make two small matching pillows from (420 nok = 66 usd)
- Plates for installation x 3 (105 nok = 16.5 usd)
- Total material cost : 1089 nok = 171 usd
Equipment:
- Spray Glue
- Staple gun and staples
Making a DIY Headboard:
- Lay board and foam on top of each other, mark the middle so you know where i line up.
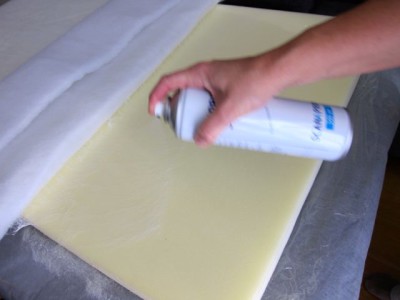
- Spray glue on the entire board and press down the foam.
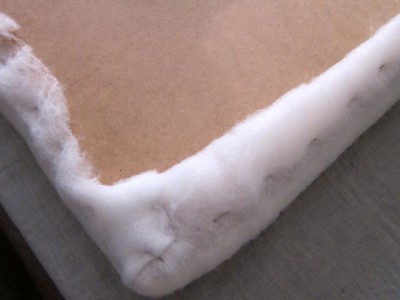
- Add Batting by spraying glue on the foam and pressing down. I also secured these using staples. be sure to pull a lot. Cut off the extra.
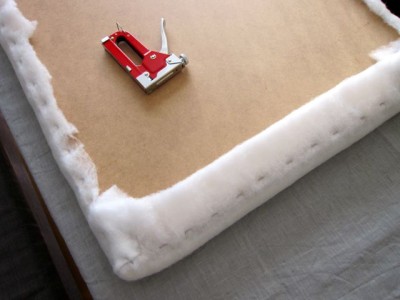
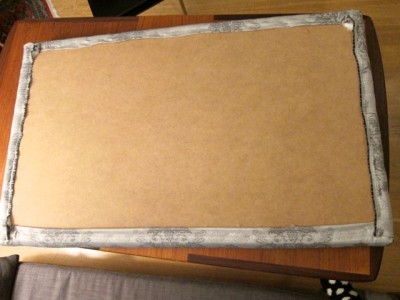
- Place the fabric nicely on the board. Make sure to check for patterns, etc. First staple the top, then the bottom. Make sure to pull the fabric. Leave a couple of cm in the sides.

- Staple the sides.Leave a couple of cm in the sides.
- Be really careful when doing the corners! This was the hardest part. They have to look nice and similar. I made one type for the top and one for the bottom (which will not be seen as well). Turn it around and take a moment to admire your work.
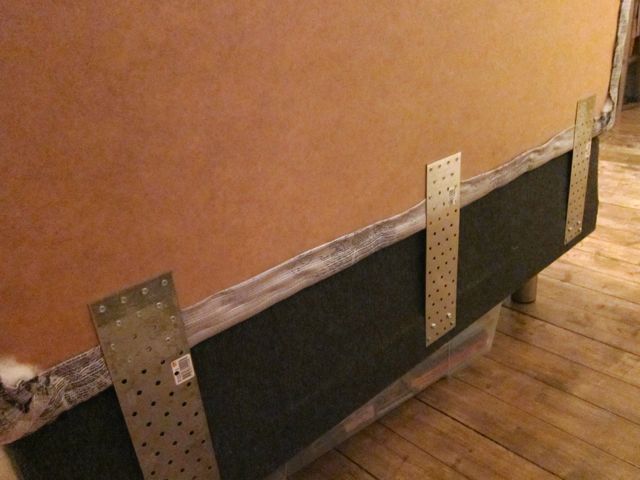
Installation:
I decided that I wanted to secure the header the my bed instead of the wall. We got 3 of these plates at a hardware store and I did a really good job of securing them to the headboard (11 screws per plate = 33 in total). Because lets face it – I did not want to come on the cover of the newspaper: “Woman (23) killed by homemade headboard – experts warns again the DIY-trend”.
I then screwed the other side of the plates to my bed frame. I only used 4 screws per board = 12 in total, because these were long screws. I really know it will not fall and kill me during the night (oh yeah!) but if I ever want to re-arrange my room I will need help because this bad-boy falls backwards!

I then kidnapped some pillows from the living room to make this masterpiece complete. I really like the purple pillow – looks so elegant! I think I want to get some kind of duvet – maybe black or dark grey to have on the bed.
Which colour duvet should I get? Also my coral night stand no longer works so I am totally stuck on which colour to paint it – give me some tips please!


Your headboard turned out really well – I especially like the print you chose!
Thank you 🙂 I really like it too! Now Im just trying to figure out how to co-ordinate it with a new colour on my night stand, new duvet and maybe change the pillows haha!
Looks fantastic! I would love it if you joined and contribute your awesome posts at my link party at City of Creative Dreams, starts on Fridays 😀 Hope to see you there at City of Creative Dreams Link Party.
Thank you 🙂 I wrote it down so hopefully I will remember to stop by! 🙂
I absolutely love this! It looks amazing. Pinned. It is so fun to party with you. Thank you. I hope to see you at our party on Monday at 7 pm. http://loulougirls.blogspot.com/
Happy Saturday! Lou Lou Girls
Thanks 🙂 I always enjoy partying with you 🙂